Raven
In this post, I'll review the construction of a Teen Titans' Raven redesign. The client initially sent me the art below from the animated Teen Titans series.
While this was the base for the design, we wanted to amp it up and make it more cinematic. So, I decided to add many details and pulled in different fabrics to create some detail and depth. I began with the suit.
I drafted a basic pattern based on the client's measurements, and then, using Swedish tracing paper, I mapped out the style lines. Here are the front and sleeve patterns.
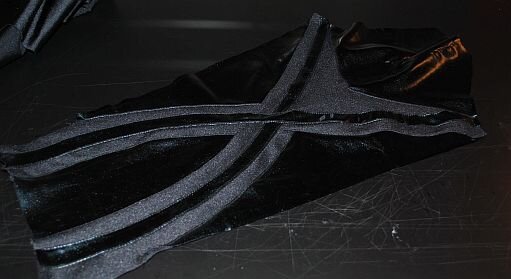
I began with the body of the suit. The details sections are made of metallic-coated spandex, and the base is black jumbo spandex. To create the pieces, I worked in sections cutting the paper patterns apart, transferring them to the fabrics and assembling them like a puzzle. Here are the front and one of the sleeves assembled.
I then assembled the back pieces, added the collar and finished all of the edges.
Once the suit was complete, I began on the cape. I liked the concept in the art of the collar inside the hood and shoulder drape, so I wanted to bring a collar/yoke into the redesign to complete the look when the hood was worn down. This will also help to stabilize the cape during wear and keep it from shifting around.
At the same time that I drafted the yoke pattern, I also drafted the hood based on an Assassin's Creed hood that was scaled to the client.
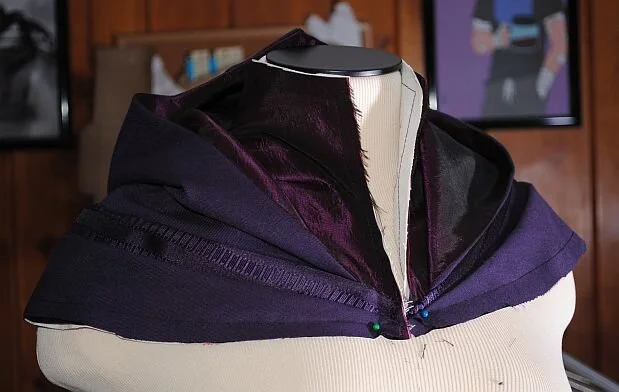
The inner yoke was made of purple taffeta. The main cape pattern is a lightweight suiting blend and an accent fabric with a geometric jacquard pattern. The yoke was assembled, the hood was added to that, and then, to create the effect of the drapes around the shoulders, I used strips of the main fabric and the jacquard and similarly applied them in a pleated/woven design. Here is the upper part of the cape assembled.
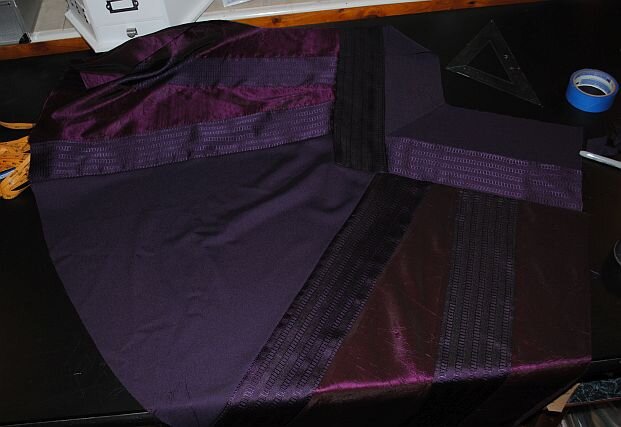
The rest of the cape was cut in interlocking stripes that were designed to, when spread open, represent a bird's spread wings. I built the cape from back to front and then attached it to the yoke.
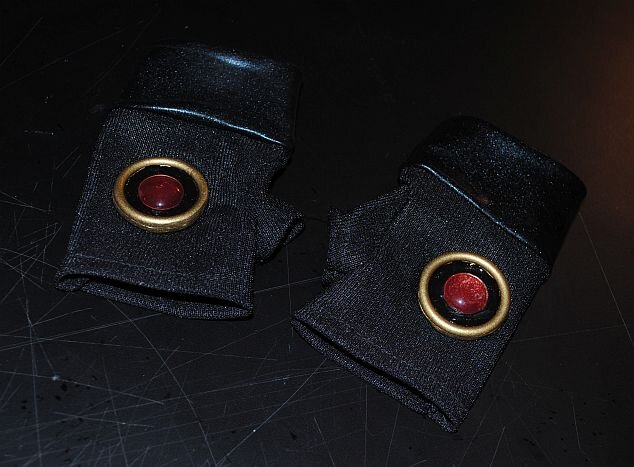
I found some metal rings in appropriate sizes to create the hardware for the belt, brooch and gloves and used Sculpey to build up the discs. I then used a fast-curing putty to make the molds for the pieces. Since these pieces were very simple and I didn't need the molds to last a long time, I didn't feel the need to build a mold box, mix and pour the rubber and wait for it to set - the putty worked perfectly well.
I then took the small rings that I used on the sides, pressed them into the molds and poured resin into the rest. This embedded the metal rings into the resin, so I had strong links for the belt. I left out the metal rings and cut the resin sides off the finished casts for the brooch and glove pieces.
The jewels in each piece's centre were made using clear glass cabochons. These were painted on the back with red metallic automotive paint and silvered. The finished discs were sanded and painted, and the cabochons were glued to the center of each one.
The last things were to finish off the cape yoke with a taffeta lining and line the body of the cape. The cape was lined in taffeta with some accent stripes of jacquard to pull alf the elements together. Here are pictures of the finished components of the costume.
